Video Guide
Step by Step Guide
If you use WordPress for your website, this guide will show you how to add your Kantr Sales Assistant.
Before you start
- Log in to app.kantrsoftware.com.
- Click on the Sales Assistant option on the left menu
- Scroll down to the Add To Website section and copy your installation snippet.

Install the WPCode plugin
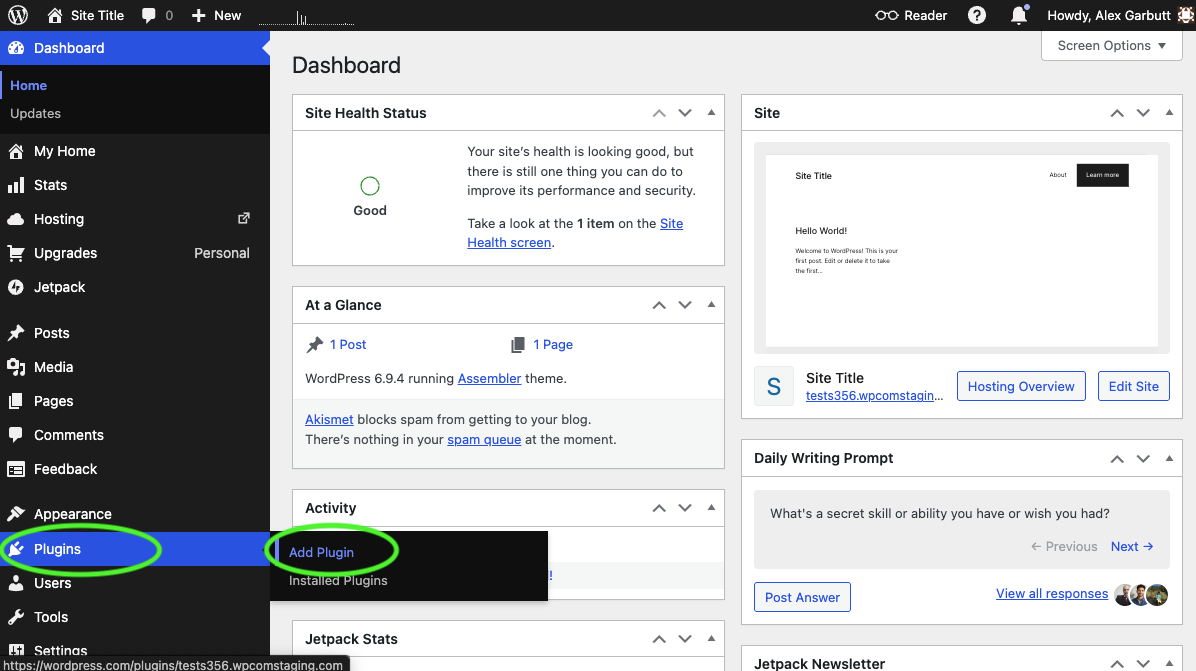
- Open your WordPress admin dashboard and click on the Plugins menu item in the left sidebar and Add Plugin.
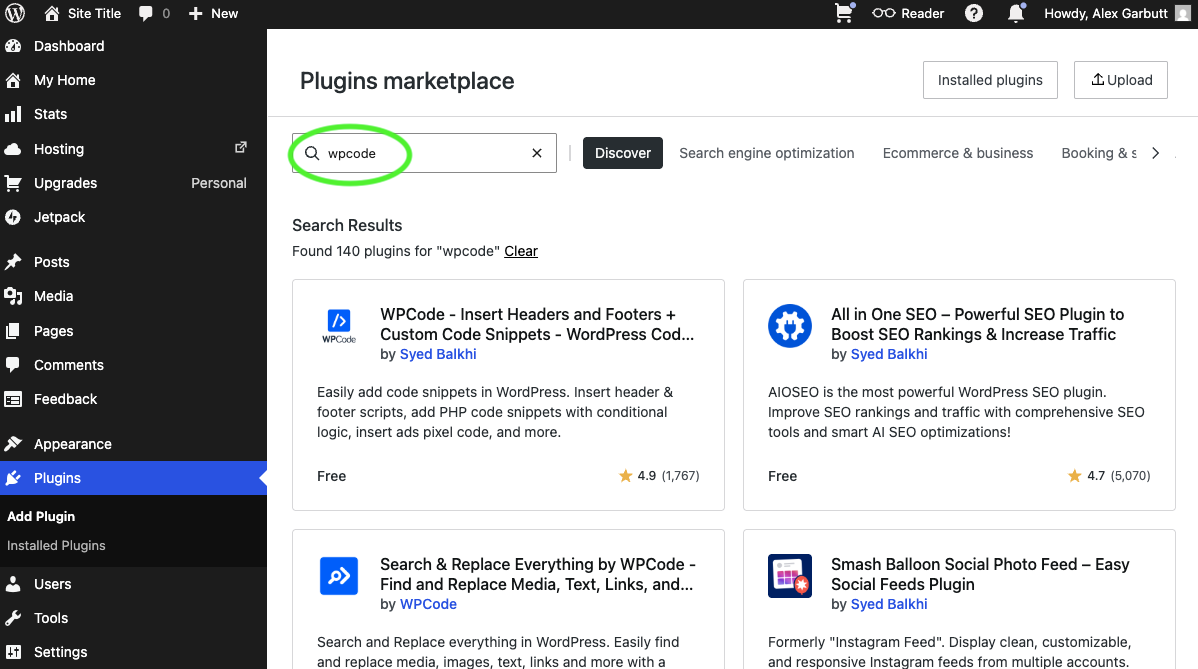
- In the search bar, type WPCode and look for WPCode - Insert Headers and Footers.
- Click Install and activate to install the plugin.
Add the Kantr code block
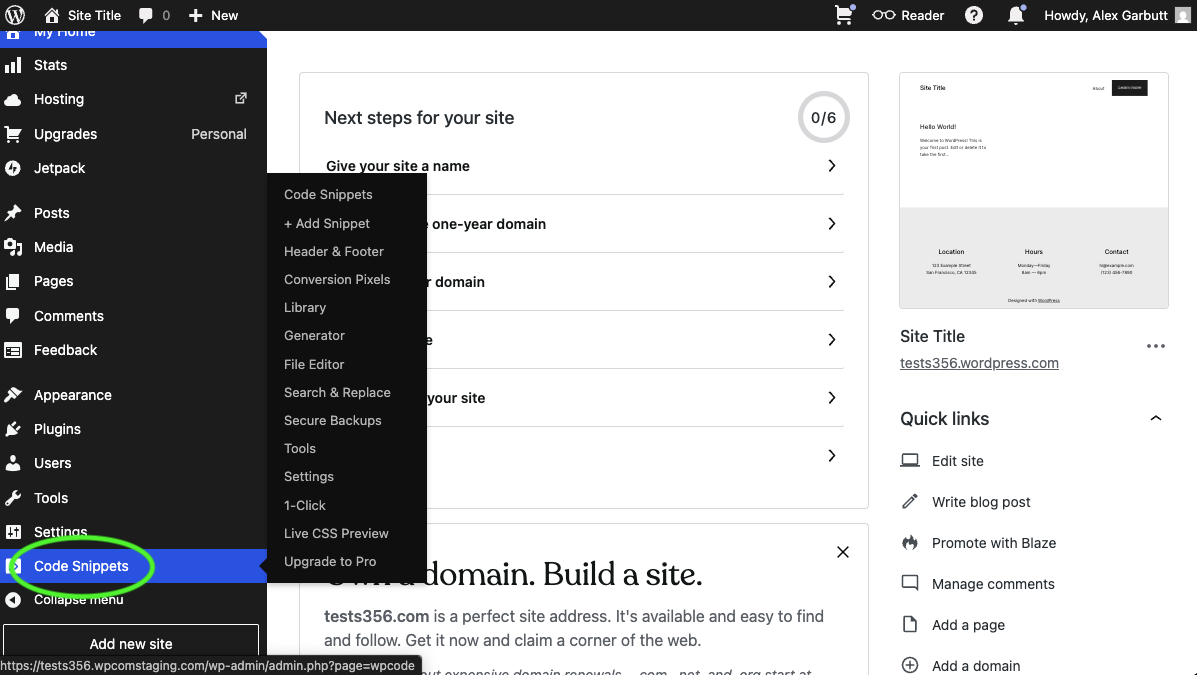
- Click on Code Snippets in the left sidebar.
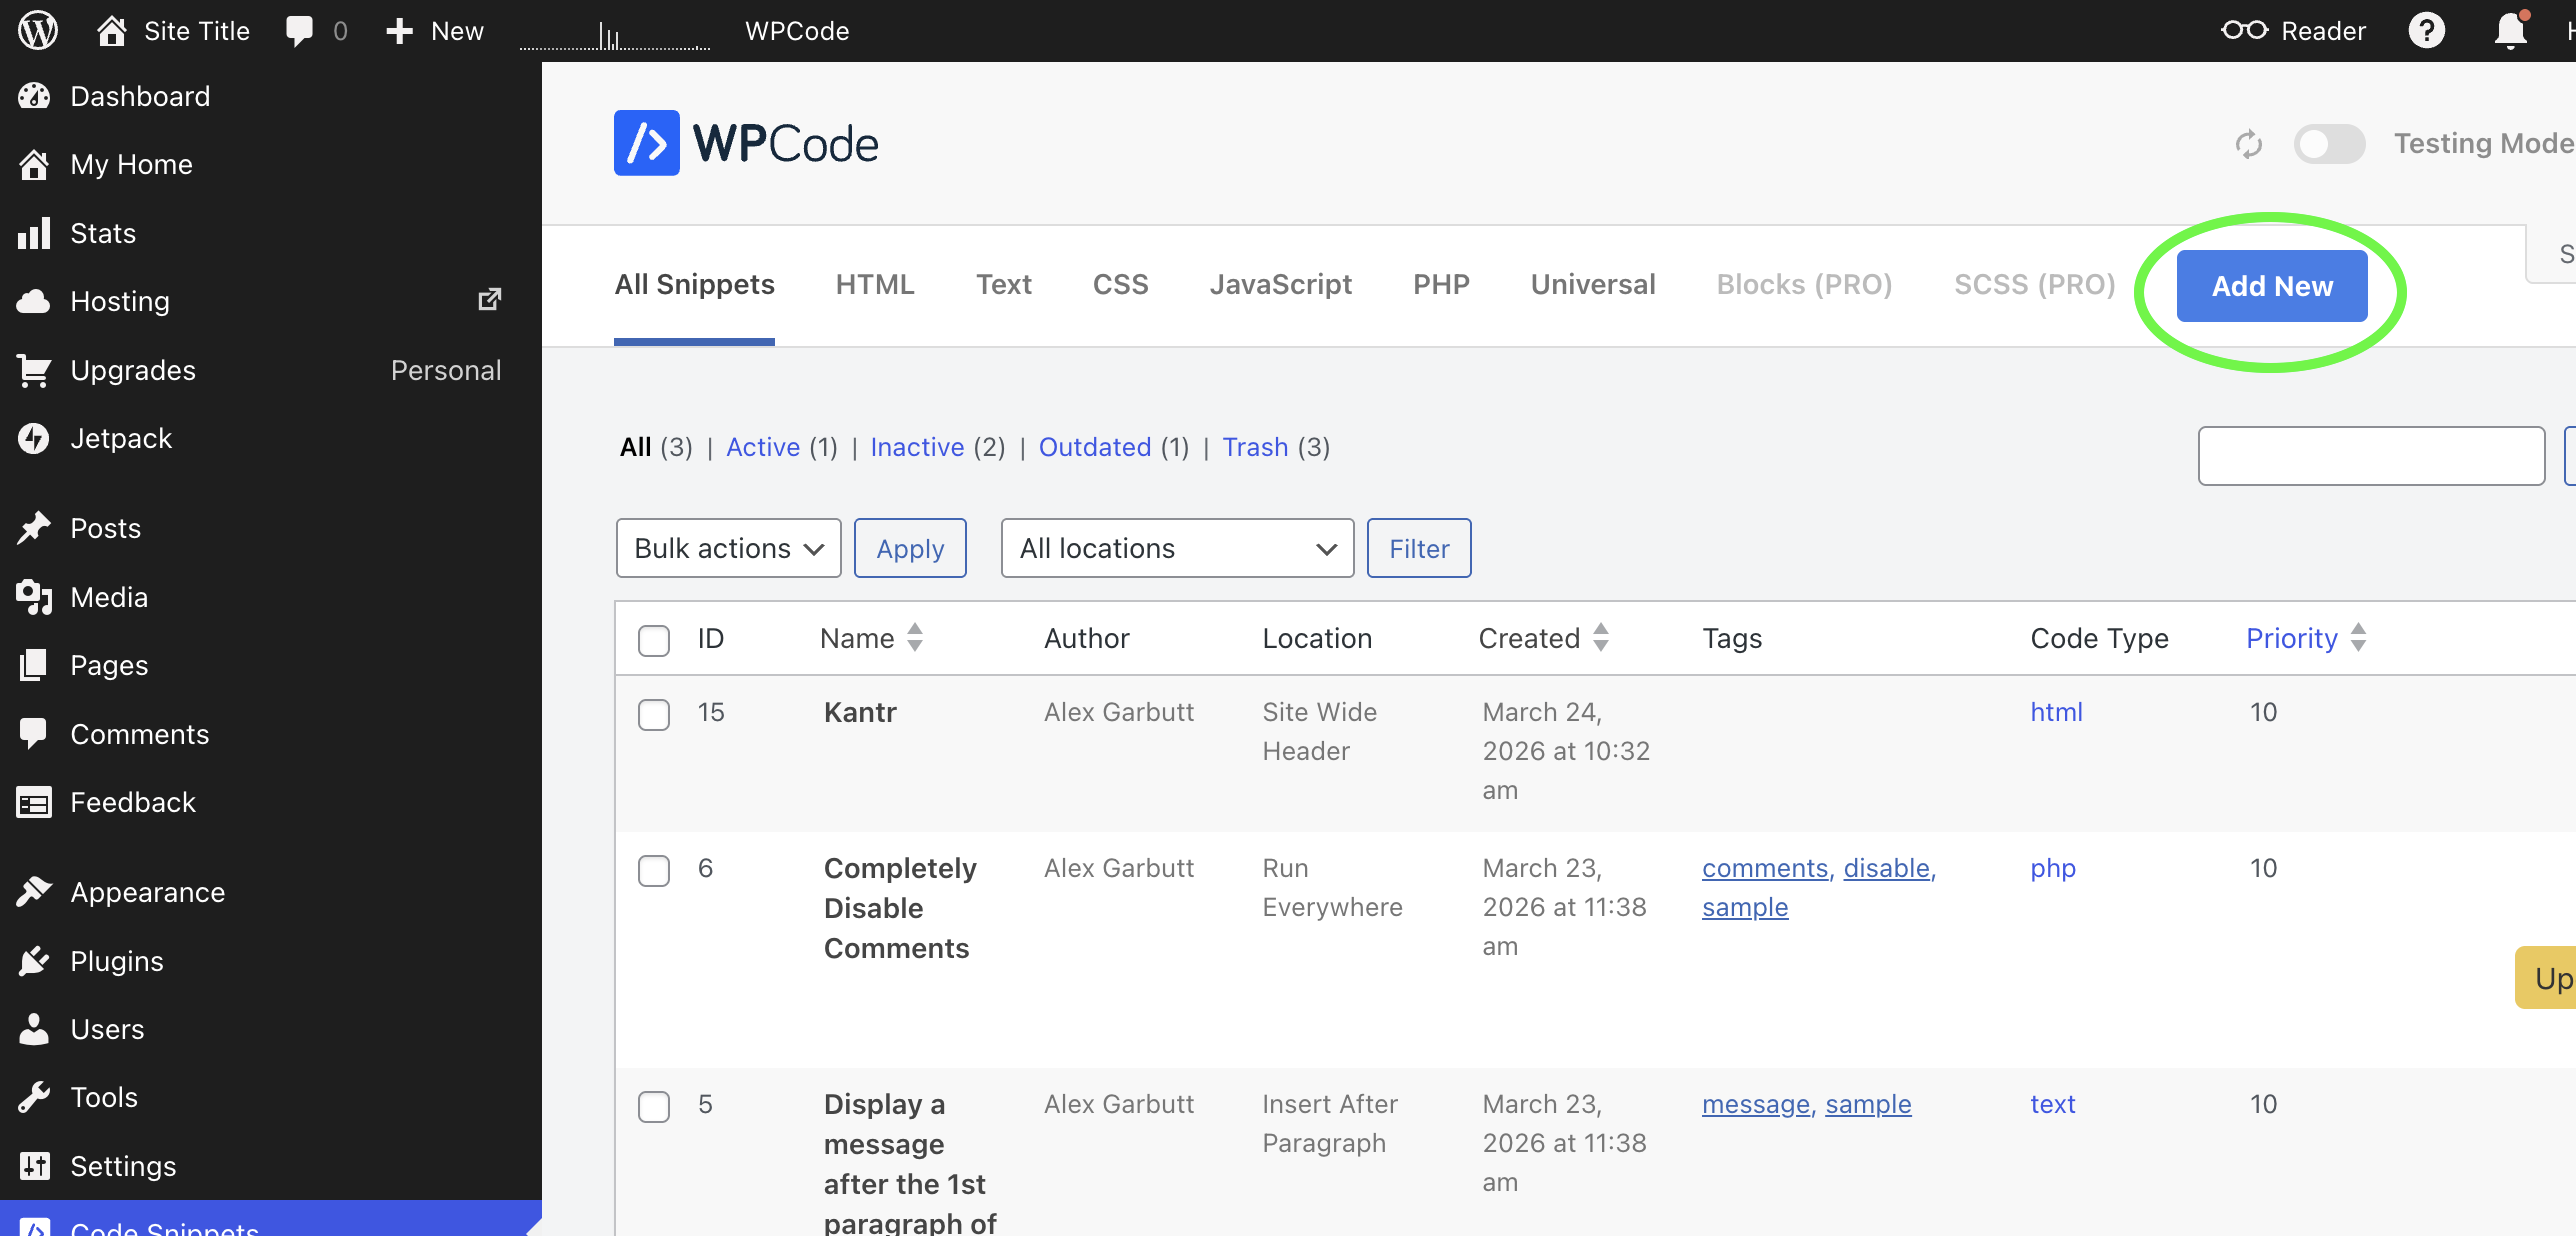
- Click Add New to create a new code block.
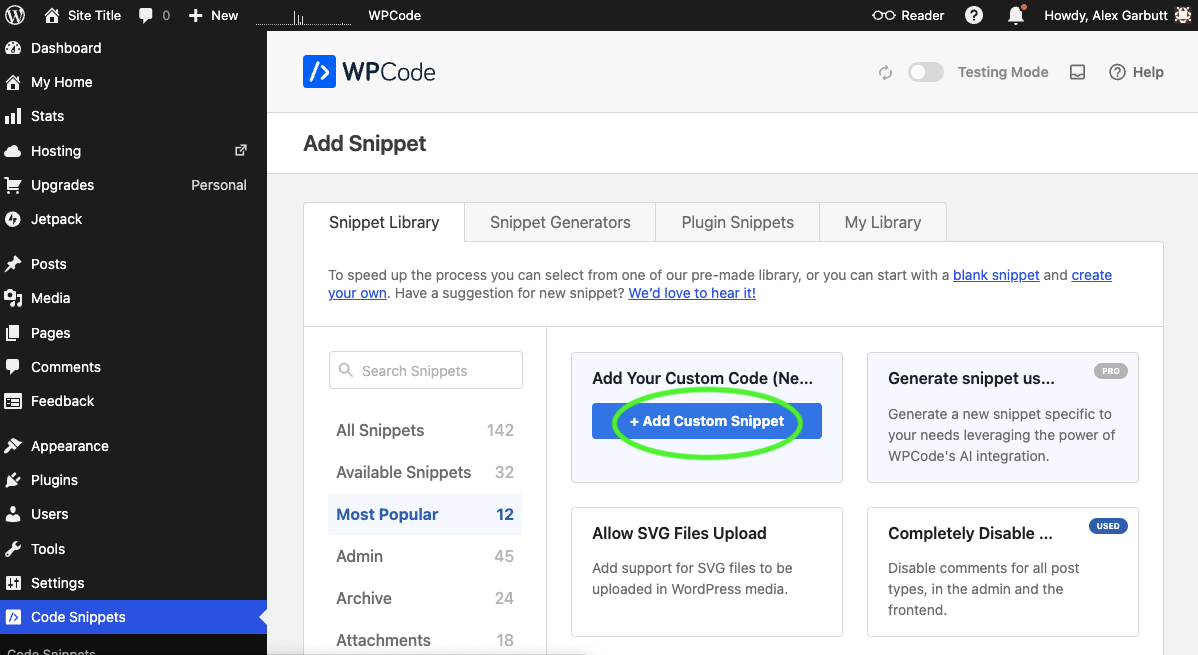
- Select Add Your Custom Code from the options.
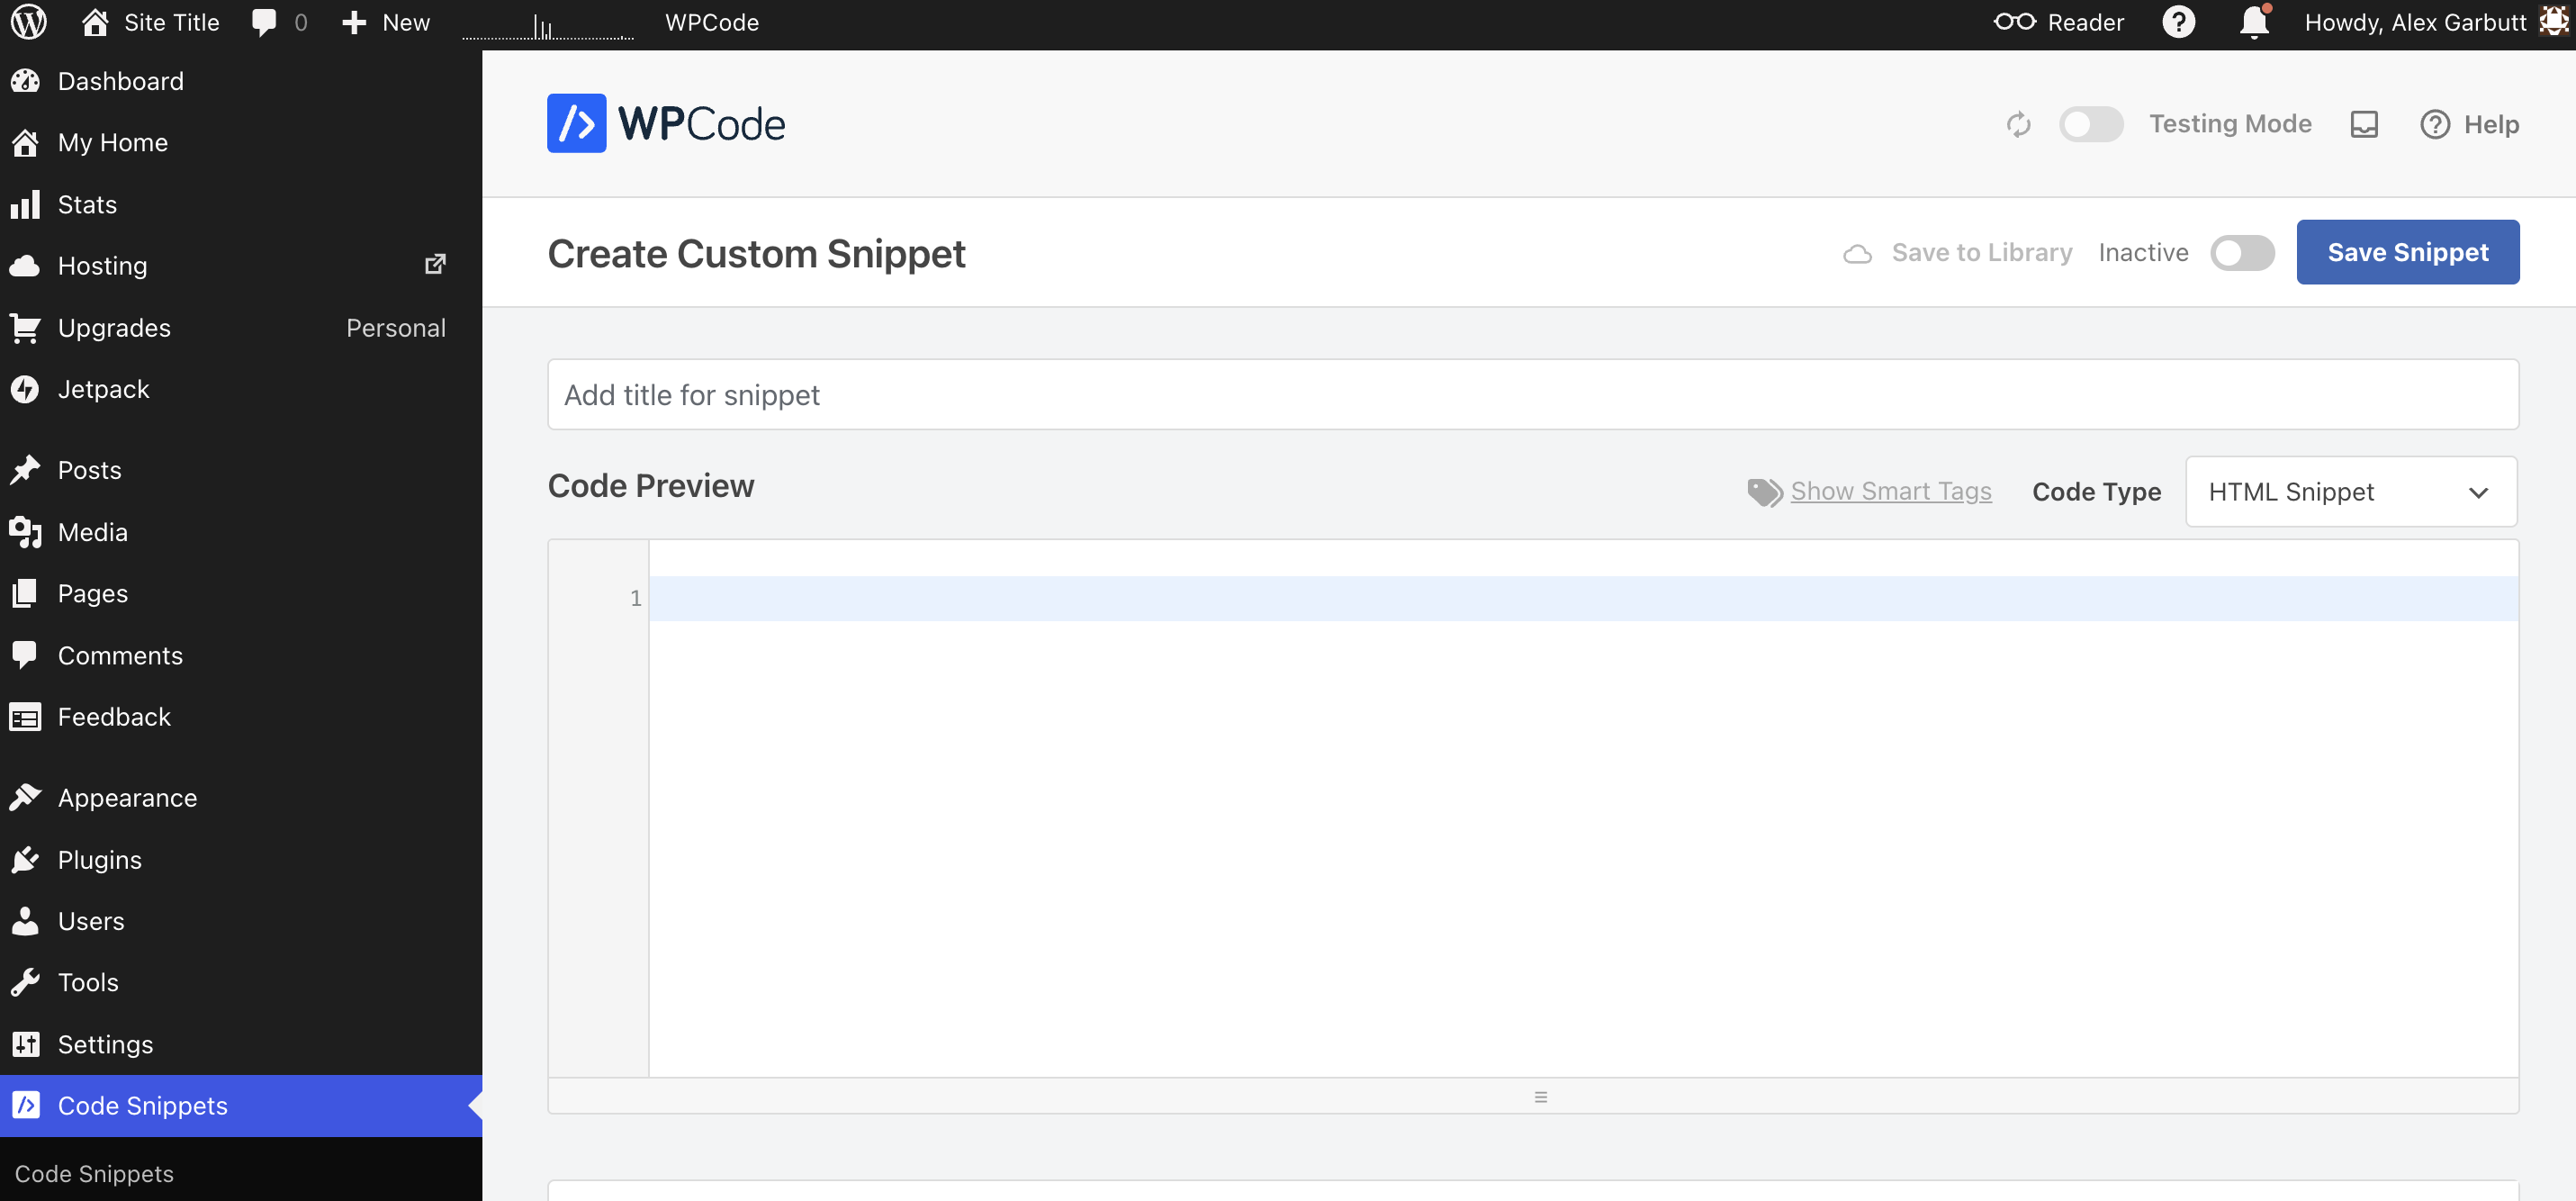
- Select HTML Snippet from the options.
- Add the title Kantr.
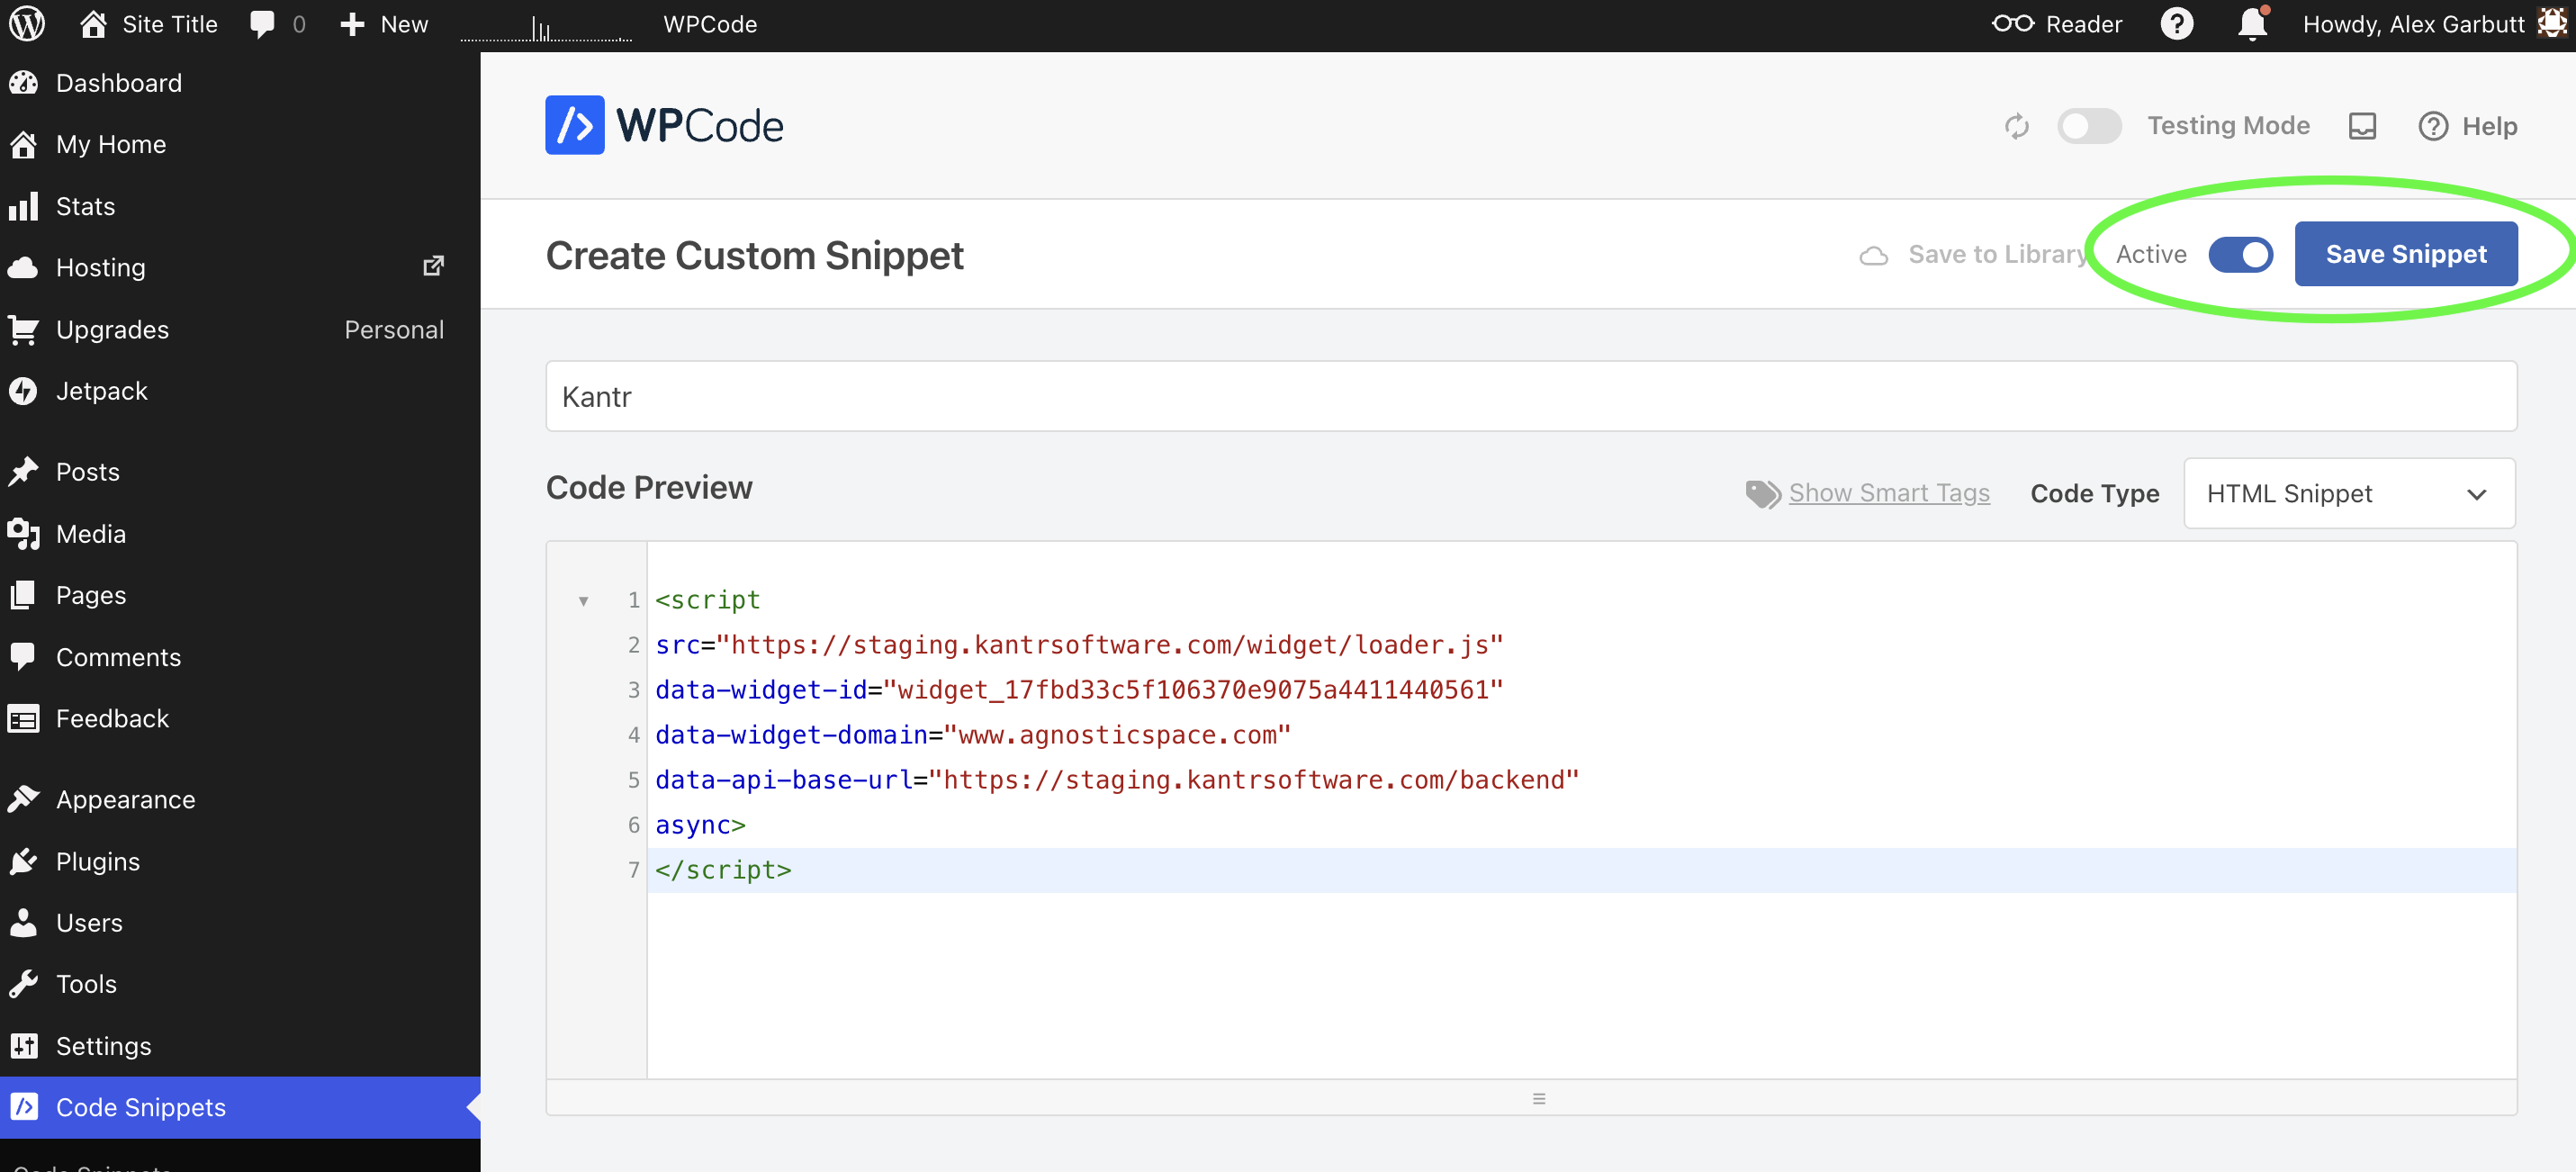
- Paste your Kantr snippet into Code Preview section.
- Before you save, make sure the toggle next to the Save Snippet button is set to Active.
- Click Save Snippet to save the code block.
That's it!
That's it! Your Kantr Sales Assistant should now be installed and active on your website.